Most epoxy floors fail because of what happens before the coating goes down. Here's what the process actually looks like when it's done right.
Most epoxy floors don’t fail because of the epoxy. They fail because of what happened — or didn’t happen — before the epoxy ever touched the concrete. Skipped moisture tests. No diamond grinding. A product pulled off a hardware store shelf. It’s a pattern we’ve seen play out across Nassau County for decades, and it’s almost always avoidable. This guide breaks down what a proper epoxy floor installation actually involves, from the first assessment to the final cure, so you can tell the difference between a contractor who knows the process and one who’s guessing at it.
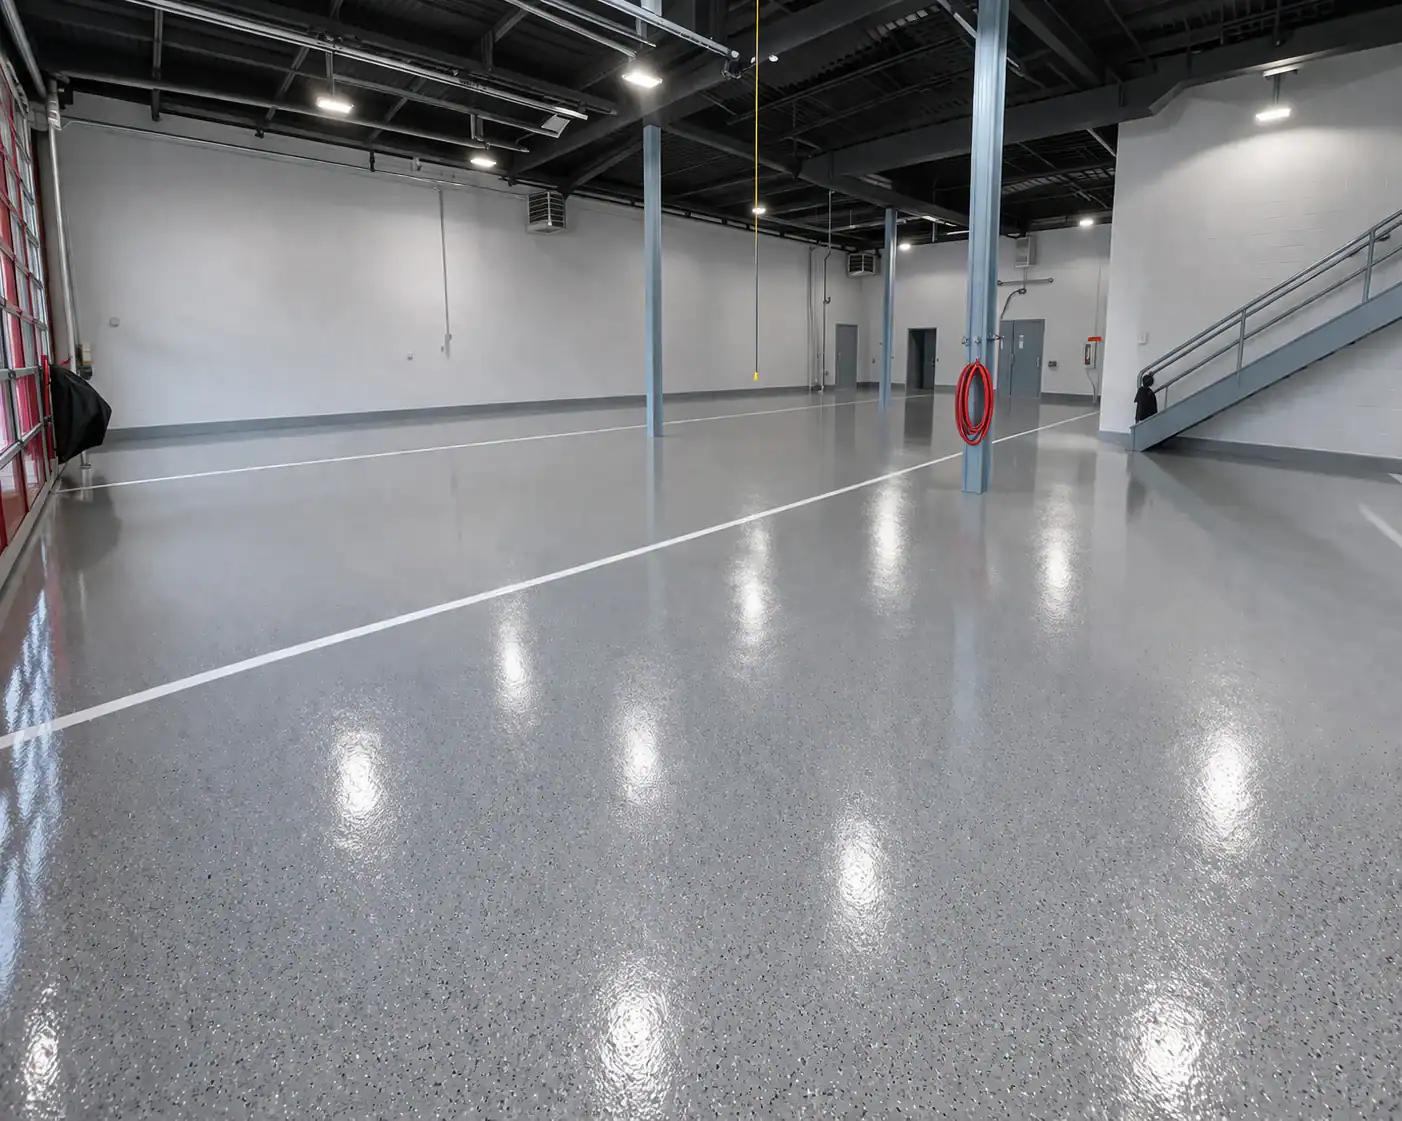
Surface preparation isn’t the most exciting part of the conversation, but it’s the one that matters most. Industry data consistently points to surface prep as the cause of 80 to 90 percent of coating failures — not the product, not the application, not the weather. The prep. When a floor delaminates or starts peeling within a year, it almost always traces back to a slab that wasn’t properly profiled before the coating went down.
The standard for professional epoxy floor installation is diamond grinding, not acid etching. Diamond grinding opens up the concrete surface at a mechanical level, creating the texture and profile the epoxy needs to bond correctly. Acid etching is cheaper and faster, which is exactly why some contractors use it — but it leaves a weaker surface profile and can introduce moisture complications that cause problems down the road.
For large commercial and industrial floors, shot blasting is sometimes the right call instead of — or alongside — diamond grinding. Shot blasting uses steel shot propelled at high velocity across the concrete surface, removing contaminants and creating a consistent surface profile across a wide area quickly. It’s particularly useful in warehouse environments, distribution centers, and manufacturing facilities where you’re working with thousands of square feet and need a uniform result.
The choice between diamond grinding and shot blasting depends on the size of the project, the condition of the existing slab, and the type of coating system being applied. For most commercial kitchens, healthcare facilities, and automotive shops in Nassau County, diamond grinding gives us the control we need to work around drains, cove bases, and irregular surfaces. For open industrial floors, shot blasting can be faster and equally effective when done correctly.
What both methods share is the goal: a concrete surface profile that gives the epoxy something real to grip. Without it, you’re essentially applying a coating to a smooth, sealed surface and hoping adhesion holds. It won’t — not under forklift traffic, not under commercial kitchen cleaning cycles, not under the freeze-thaw stress that Long Island slabs go through every winter.
After mechanical prep, any cracks, spalls, or surface defects need to be addressed with concrete patch epoxy before the coating system begins. This step is non-negotiable. Coating over unrepaired cracks doesn’t seal them — it just hides them temporarily until movement or moisture forces them back to the surface.
Nassau County concrete takes a beating. Freeze-thaw cycles, road salt tracked in from the Southern State Parkway or Hempstead Turnpike, and the ground moisture pressure from Long Island’s shallow water table all leave marks on slabs over time. Cracks, spalling, and surface pitting are common — and they need to be properly filled and cured before any coating system goes down.
Concrete patch epoxy is a high-strength, fast-curing material used to repair these defects. It bonds directly to the prepared concrete, fills voids, and creates a uniform surface that the floor coating can adhere to consistently. The repair compound needs to be matched to the substrate and the coating system — not every patching product is compatible with every epoxy formulation, and using the wrong one can create weak points in the finished floor.
The cure time on patch repairs matters too. Rushing this step — applying the base coat before the patch has fully cured — is a common shortcut that creates soft spots and adhesion failures down the line. We give patch repairs the time they need, because the alternative is a floor that looks finished but isn’t.
Once the surface is ground, patched, and cleaned, the slab has to be tested for moisture before anything else happens. This is the step that separates contractors who understand resinous flooring from those who are just applying product and hoping for the best.
Want live answers?
Connect with a Advanced Epoxy Flooring expert for fast, friendly support.
Long Island isn’t inland. Nassau County is bordered by the Atlantic Ocean to the south, Long Island Sound to the north, and Jamaica Bay to the west. The county sits on a glacial outwash plain with a shallow water table — which means ground moisture is a constant upward pressure on concrete slabs, especially in basements, ground-floor commercial spaces, and anywhere near the coastline.
A slab can look completely dry and still be pushing moisture vapor upward at a rate that will destroy an epoxy coating from the inside out. Concrete moisture testing isn’t optional here — it’s the difference between a floor that lasts 15 years and one that starts bubbling within 12 months.

There are two primary methods used to test concrete slabs for moisture before epoxy installation, and understanding the difference matters if you want to know whether a contractor is doing this right.
The calcium chloride moisture test — standardized as ASTM F1869 — measures moisture vapor emission from the concrete surface over a 60 to 72 hour period. It’s been widely used for decades and gives useful data about what’s happening at the surface level. The current version of the standard is ASTM F1869-23.
The in-situ relative humidity test — standardized as ASTM F2170 — goes deeper. Literally. It requires drilling into the slab to 40 percent of the slab’s depth, inserting RH probes, and allowing them to equilibrate for 24 hours before reading. This gives a much more accurate picture of the moisture condition throughout the slab, not just at the surface. Most major epoxy and coating manufacturers now require or strongly prefer ASTM F2170 data, and Sherwin-Williams HPF explicitly recommends it for epoxy and MMA systems.
For most epoxy flooring systems, the acceptable relative humidity threshold is 75 to 80 percent. Between 80 and 90 percent, mitigation measures are required. Above 90 percent, you’re looking at specialized systems — typically moisture-tolerant primers or urethane cement — that can handle the vapor pressure without delaminating. In Nassau County, where ground moisture is a structural reality rather than an occasional concern, we test every slab and let the data drive the system selection. There’s no other responsible way to do it.
The moisture challenge in Nassau County isn’t just coming from below. Summer ambient humidity on Long Island regularly exceeds 70 to 80 percent — which affects not just the slab itself but the application window for epoxy systems. Epoxy applied when ambient humidity is too high can cure improperly, trap moisture beneath the surface, and fail in ways that aren’t immediately visible but show up within months.
This is one of the reasons we track both slab moisture and ambient conditions before and during every installation. A slab that passes its moisture test on a dry spring morning might present differently on a humid August afternoon in Freeport or Long Beach. Coastal humidity is a variable that contractors from outside the region often underestimate — and one that our 35 years of working specifically in Nassau and Suffolk County has taught us to take seriously.
For epoxy basement floor installations, the moisture picture gets even more complex. Basements in Nassau County sit close to the water table, and many were never designed with vapor barriers that meet modern performance standards. An epoxy floor basement installation without proper moisture assessment and, where needed, a moisture-mitigating primer system is a floor that will fail. The coating may look perfect for six months. Then the vapor pressure builds, the bond breaks, and you’re back to bare concrete — plus the cost of removing a failed coating before starting over.
The concrete moisture testing methods we use aren’t just protocol. In Nassau County, they’re the reason our floors hold up when others don’t.
The process described here — moisture testing, diamond grinding, crack repair, system selection, proper cure — is what professional epoxy floor installation actually looks like. It’s not complicated, but it takes time, the right equipment, and the experience to know when conditions aren’t right and what to do about them. Most floors fail because someone skipped a step. Usually the same steps.
If you’re getting quotes for an epoxy floor in Nassau County, ask each contractor how they test for moisture, what surface preparation method they use, and what system they’re recommending for your specific environment. The answers will tell you a lot. A contractor who can explain the process clearly, cite the standards they work to, and match the system to your actual conditions is a contractor who knows what they’re doing.
We’ve been doing this work on Long Island since 1990. Reach out to us directly — we’re straightforward about what your floor needs, what it will cost, and what you can realistically expect it to do for the next 10 to 20 years.
—
**Frequently Asked Questions**
**What should I look for in epoxy floor coating contractors?** Start with the basics: How long have they been doing commercial epoxy work — not just painting or general flooring, but specifically resinous flooring systems? Do they test for moisture before installation? What surface preparation method do they use? In Nassau County, where ground moisture and coastal humidity are real factors, you also want a contractor who has worked in this specific environment long enough to understand how local conditions affect installation and longevity. Certifications matter too — OSHA 40 certification for installers is a meaningful signal that a contractor takes site safety and professional standards seriously.
**What causes bubbles in an epoxy floor?** Bubbles in an epoxy floor almost always point to one of two things: outgassing from the concrete or moisture vapor pushing up through the slab after the coating has been applied. Outgassing happens when air trapped in the concrete escapes through the coating as it cures — usually because the surface wasn’t properly prepared or the coating was applied too thick. Moisture vapor is the more common culprit in Nassau County, where slabs near the water table or in coastal areas like Long Beach, Oceanside, or Merrick are under consistent upward moisture pressure. Both causes are preventable with proper concrete moisture testing and surface prep before the job starts.
**What is a quartz epoxy floor and where is it used?** A quartz epoxy floor is a system where quartz aggregate — typically silica sand — is broadcast into a wet epoxy base coat before a topcoat is applied. The result is a surface that’s more slip-resistant, more durable under foot traffic, and more visually consistent than a standard smooth epoxy. It’s commonly used in commercial kitchens, healthcare facilities, schools, and retail environments where hygiene and traction both matter. In Nassau County, we install quartz epoxy floor systems in commercial kitchens that need to meet local health code requirements — smooth enough to clean easily, textured enough to be safe when wet.
**What is the epoxy floor cost per square foot in Nassau County?** Epoxy flooring cost in Nassau County typically runs from $3 to $5 per square foot for a basic single-coat system up to $10 to $14 per square foot for high-performance industrial or specialty systems. Standard decorative flake systems — the most common choice for garages and light commercial spaces — generally fall in the $5 to $8 range. Metallic and designer systems run $8 to $12. The variables that move the number most are the condition of the existing slab, the level of surface preparation required, and the coating system selected. A basement floor in a coastal Nassau County community that needs moisture mitigation before coating will cost more than a clean, dry warehouse slab — and it should. Getting the prep right is what makes the price worth paying.
Summary:
Article details:
Share: